PHOTOCOPIER TROUBLESHOOTING GUIDE FOR OFFICE ADMIN
Aug 21, 2025

Quick Fix for Offices: Easy Waste Toner Tank Replacement in Photocopiers
Quick Fix for Offices: Easy Waste Toner Tank Replacement in Photocopiers Nothing slows down office productivity like an error message saying, "Waste Toner Tank Full." While the best solution is to rep...
Jul 31, 2025
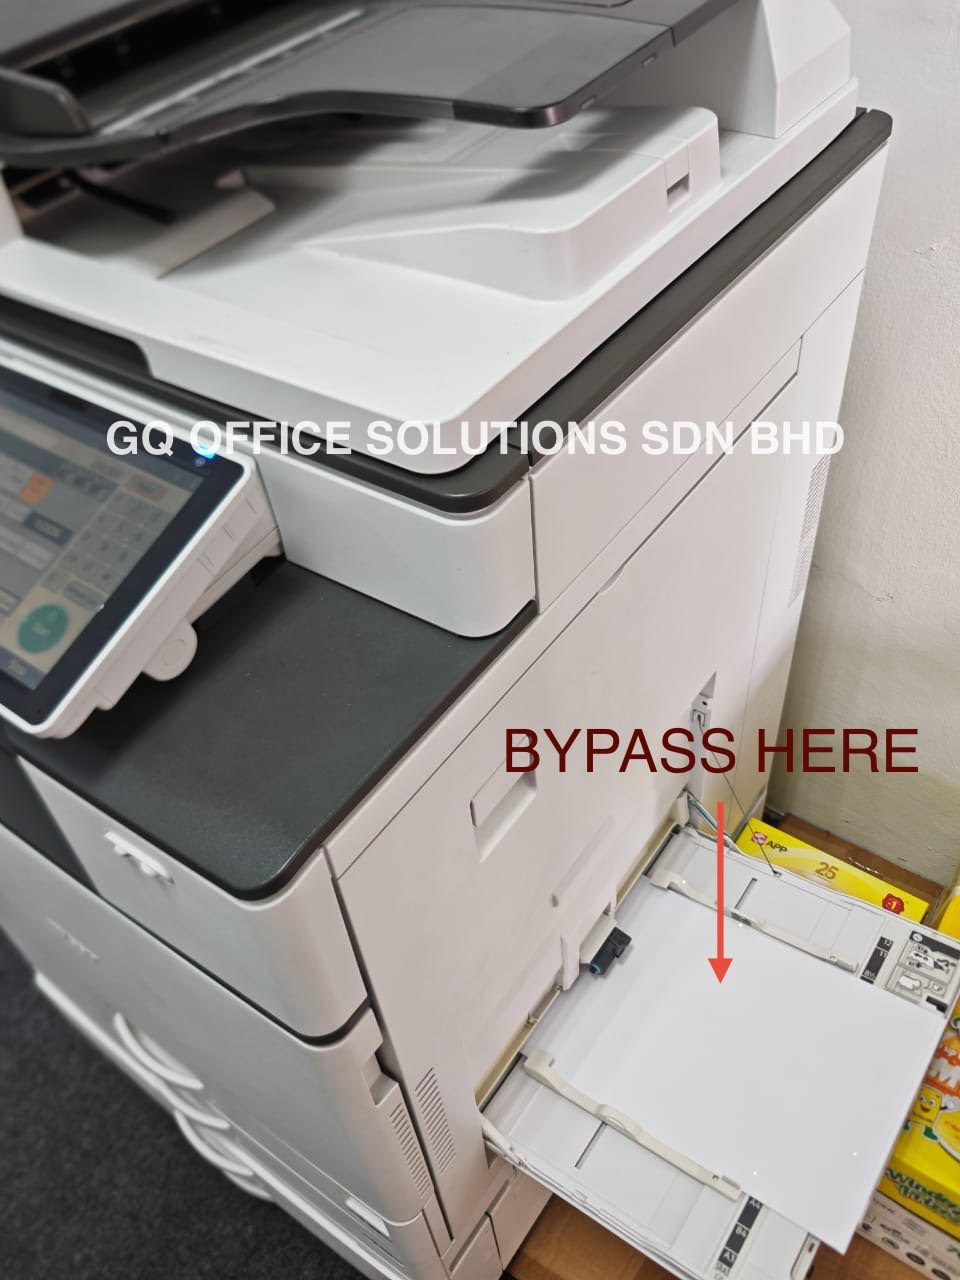
Photocopier Bypass Tray Printing: Envelopes, Labels & Thick Paper
Bypass Tray Functions Explained: The Secret to Printing Labels, Envelopes, and Thick Paper In any busy office, we've all faced the same challenge. You need to print a single, crucial envelope, a batch...
Jul 9, 2025
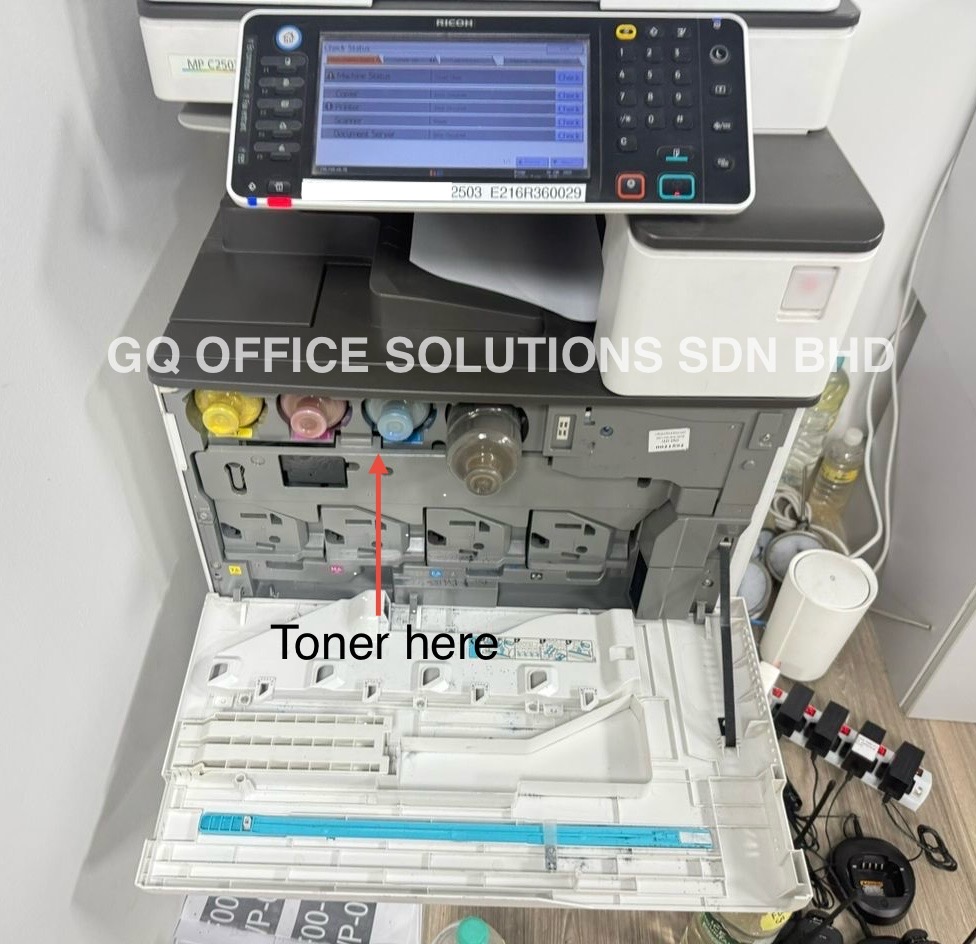
How to Change a Photocopier Toner Cartridge Safely and Correctly
How to Replace Photocopier Toner Cartridge: Step-by-Step Guide for Any Photocopier When it comes to maintaining our office's productivity, a well-functioning photocopier is crucial. A common issue we...
Jun 4, 2025
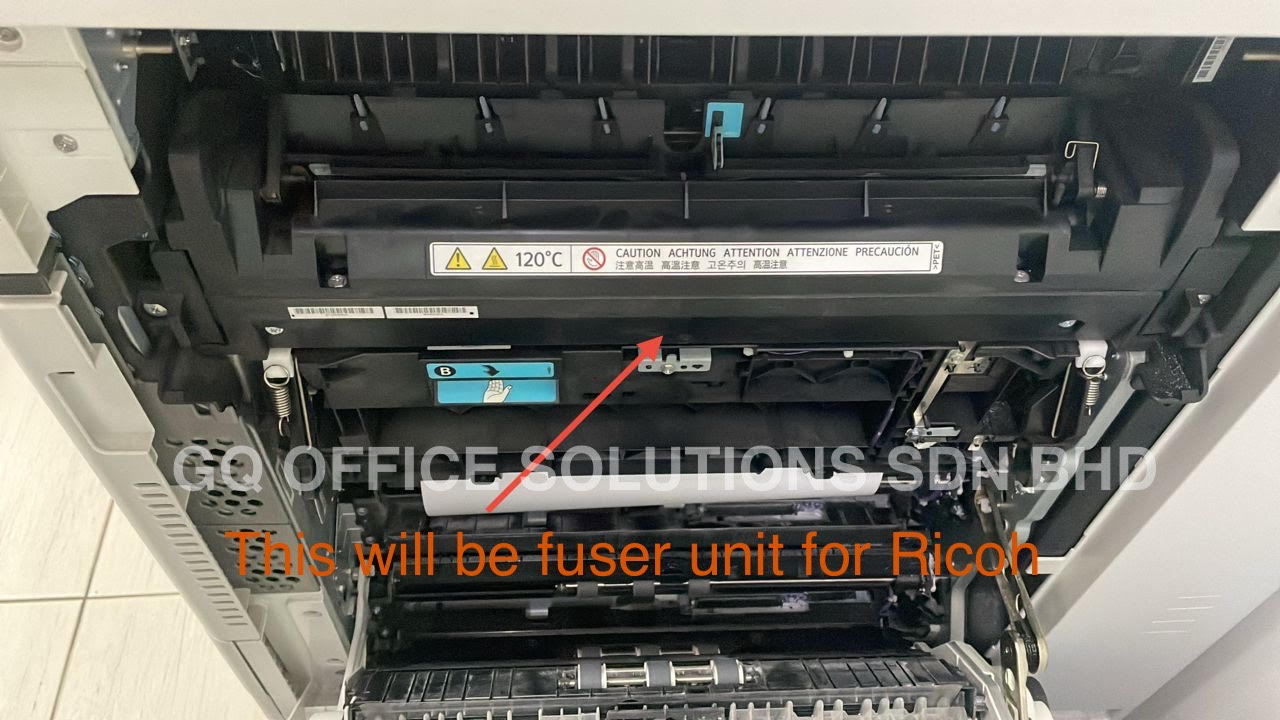
DIY Guide: How to Change the Fuser in a Photocopier or Office Copier
How to Replace a Photocopier Fuser Unit – Step-by-Step Guide for Office Copiers Are you facing a copier fuser unit issue? If your office photocopier is not producing crisp, high-quality prints,...
May 26, 2025
How to Ensure Original Document Size When Copying on Any Brand of Copier
How to Copy Original Size Documents on Any Multi-function Photocopier (Sharp, Ricoh, Fuji Xerox & FujiFilm, HP etc.) When it comes to office productivity, knowing how to efficiently use our multi-func...
May 18, 2025

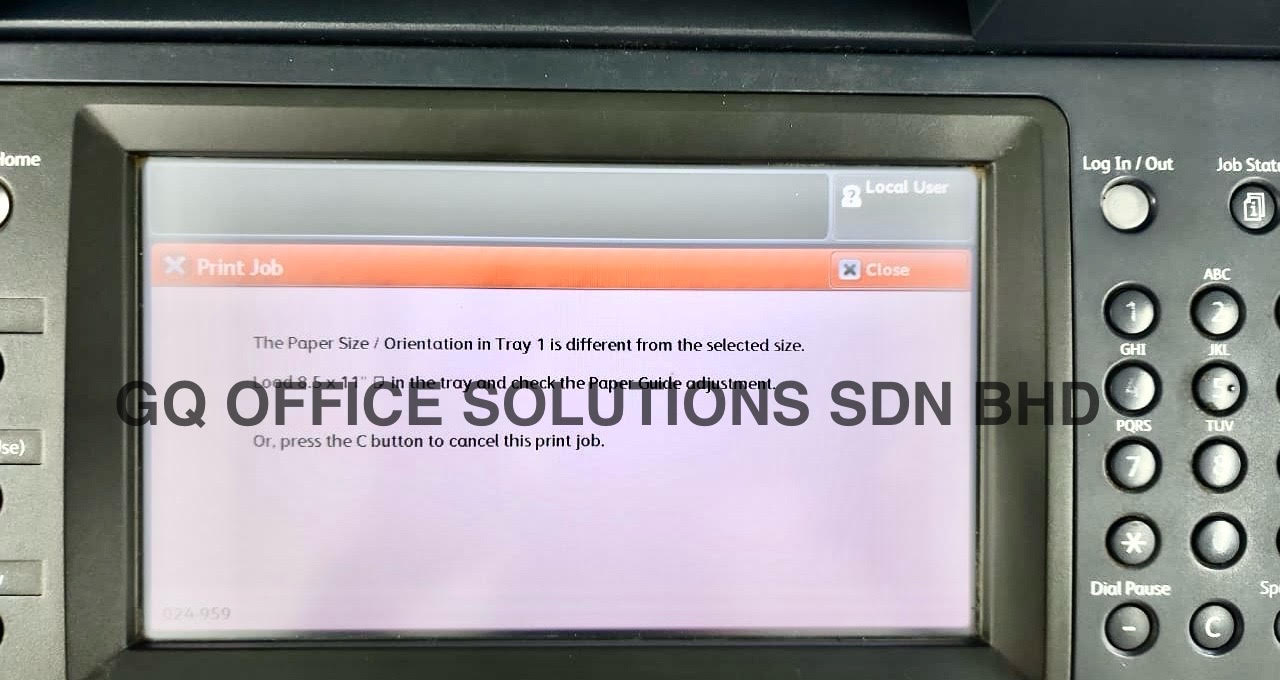
Photocopier Jam Problem? How to Clear It & Keep Your Machine Running Smoothly
Paper Jam in Copier? Here’s What to Check & How to Clear It Safely Paper jams can be one of the most frustrating issues we encounter while using copiers in our offices. They not only disrupt our...
May 10, 2025

How to Copy an ID Card Using a Copier Machine – Step-by-Step Guide
How to Make Front and Back ID Card Copies on One Page – Copier Tutorial In a world that's increasingly embracing digital solutions, we often overlook the powerful features of our trusty office c...
Apr 27, 2025

The Ultimate Guide to Cleaning Copier Glass – Fix Copy Quality Issues Fast
Improve Copy Quality Instantly – How to Clean Photocopier Glass Like a Pro In our daily routines, a multi-function photocopier is indispensable. It helps us create documents, brochures, and vari...
Apr 23, 2025

Troubleshooting Photocopier Machine Streaks & Faded Printing: Expert Tips for Clear Prints
Solve Printing Problems: How to Fix Streaks, Lines, and Faded Text We've all been there. You're about to print an important document, and instead of a crisp, clean output, you get a page marred by str...